Filming
this production facilitated my learning of both using a digital video camera
and editing software to produce good quality work. I was able to learn to frame
shots in order to create different atmospheres and effects, for example using
close-up shots to emphasise certain key objects. I also improved upon my
composing of shots to brand characters according to their role in the film,
such as high-angle shots looking down on the victim rendering him to be
vulnerable. In addition to those
techniques mentioned I learned more about editing video to produce a film that
looked natural. The methods I built on were continuity editing, match-on-action
and transitioning sections of a scene so that the final movie fits together
seamlessly.

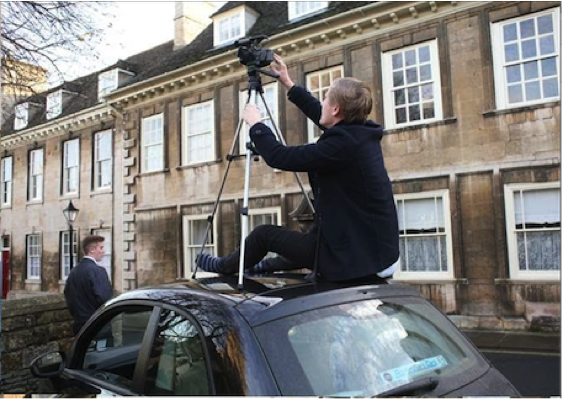
When filming on location I found out that in order to
shoot video worth watching a tripod should be used to keep the shot steady and
also horizontally level. The tripod we used had spirit levels to help with this;
this can be seen in the photograph above. These were especially useful when
filming on top of my car (image on next page). The image shows us trying out a
test shot of a high-angle long pan on the victim walking down the street, which
would accentuate his vulnerability and also provide a good transition shot.
 In our original plan for the production we had
planned to film some of the scene at night. However when we tried out some test
shots for this section we found that the quality of the video dramatically
decreased and affected our piece as whole as it seemed unprofessional. In addition to this the lighting was too dark
and many objects and even characters were poorly visible. To overcome this
problem we filmed the entire scene in day and used a day-to-night video effect on
our editing software, iMovie. This method proved to produce much better quality
video and the lighting was significantly better.
In our original plan for the production we had
planned to film some of the scene at night. However when we tried out some test
shots for this section we found that the quality of the video dramatically
decreased and affected our piece as whole as it seemed unprofessional. In addition to this the lighting was too dark
and many objects and even characters were poorly visible. To overcome this
problem we filmed the entire scene in day and used a day-to-night video effect on
our editing software, iMovie. This method proved to produce much better quality
video and the lighting was significantly better.
The
reason for choosing our location was down to several factors. Originally, as
shown in the pictures above, we had planned to film in a busy town near Bourne.
However when carrying out test shots in this location we found it very
difficult to not be interrupted by passers-by, cars and also objects that did
not suit the time period of our film. Therefore we decided to shoot the film in
a local church’s car park. Although there was other cars parked there at the
time of filming we managed to position our shots so that the composition did
not show nearly any of the modern cars. Unfortunately though there was one car
in shot for a single take.
 To
begin editing our footage we first needed to import it. iMovie for OSX allows
us to do this straight from within the program, this is beneficial for saving
time as we can edit and import without switching between software. Using this
program I learnt how to trim clips and place them together so that the video
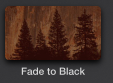
made sense to the audience, this is called continuity editing. Another
technique we made use of was fade to black transitioning; I learnt that this
was a useful way of changing between shots and making the video fit with the
audio naturally. In addition to this I was able to use built in video effects
on iMovie. We used a day-to-night effect on our video to turn down the lights
and make it appear night. We chose to
use this effect rather than actually filming at night because we discovered
during test shots that the video quality is much better and not grainy.
To
begin editing our footage we first needed to import it. iMovie for OSX allows
us to do this straight from within the program, this is beneficial for saving
time as we can edit and import without switching between software. Using this
program I learnt how to trim clips and place them together so that the video
made sense to the audience, this is called continuity editing. Another
technique we made use of was fade to black transitioning; I learnt that this
was a useful way of changing between shots and making the video fit with the
audio naturally. In addition to this I was able to use built in video effects
on iMovie. We used a day-to-night effect on our video to turn down the lights
and make it appear night. We chose to
use this effect rather than actually filming at night because we discovered
during test shots that the video quality is much better and not grainy.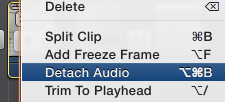 I
was also able to add non-diegetic sounds to go with the video. I used the
toolbar within iMovie to import music from iTunes. This allowed me to add both
soundtracks. Furthermore I managed to separate the audio from video files on my
timeline allowing me to trim them and used them in other places. For example
the sound of the keys being put into the ignition was used for the keys going into
the car door. Similarly to video, there are effects that can be placed on sound
too. I used a ‘telephone’ effect on the soundtrack in the strangulation scene
when the shot went outside of the car; this made it sound like the music was
coming from inside the vehicle.
I
was also able to add non-diegetic sounds to go with the video. I used the
toolbar within iMovie to import music from iTunes. This allowed me to add both
soundtracks. Furthermore I managed to separate the audio from video files on my
timeline allowing me to trim them and used them in other places. For example
the sound of the keys being put into the ignition was used for the keys going into
the car door. Similarly to video, there are effects that can be placed on sound
too. I used a ‘telephone’ effect on the soundtrack in the strangulation scene
when the shot went outside of the car; this made it sound like the music was
coming from inside the vehicle.
To
produce the video suitable for playback on standard video players and websites,
I needed to export the video as an MPEG-4 file. To do this I used the ‘share’
feature of iMovie, this allowed me to select the quality of the video, name it
and save it as the chosen file type. We chose the maximum video quality, 1080p,
so that our work could be showcased more professionally. When this had been
completed we uploaded our video to our YouTube group channel, where our
previous work had been uploaded also. We needed to do this so that we could
display the video on our blogs and advantageously receive feedback from
comments and likes.
No comments:
Post a Comment